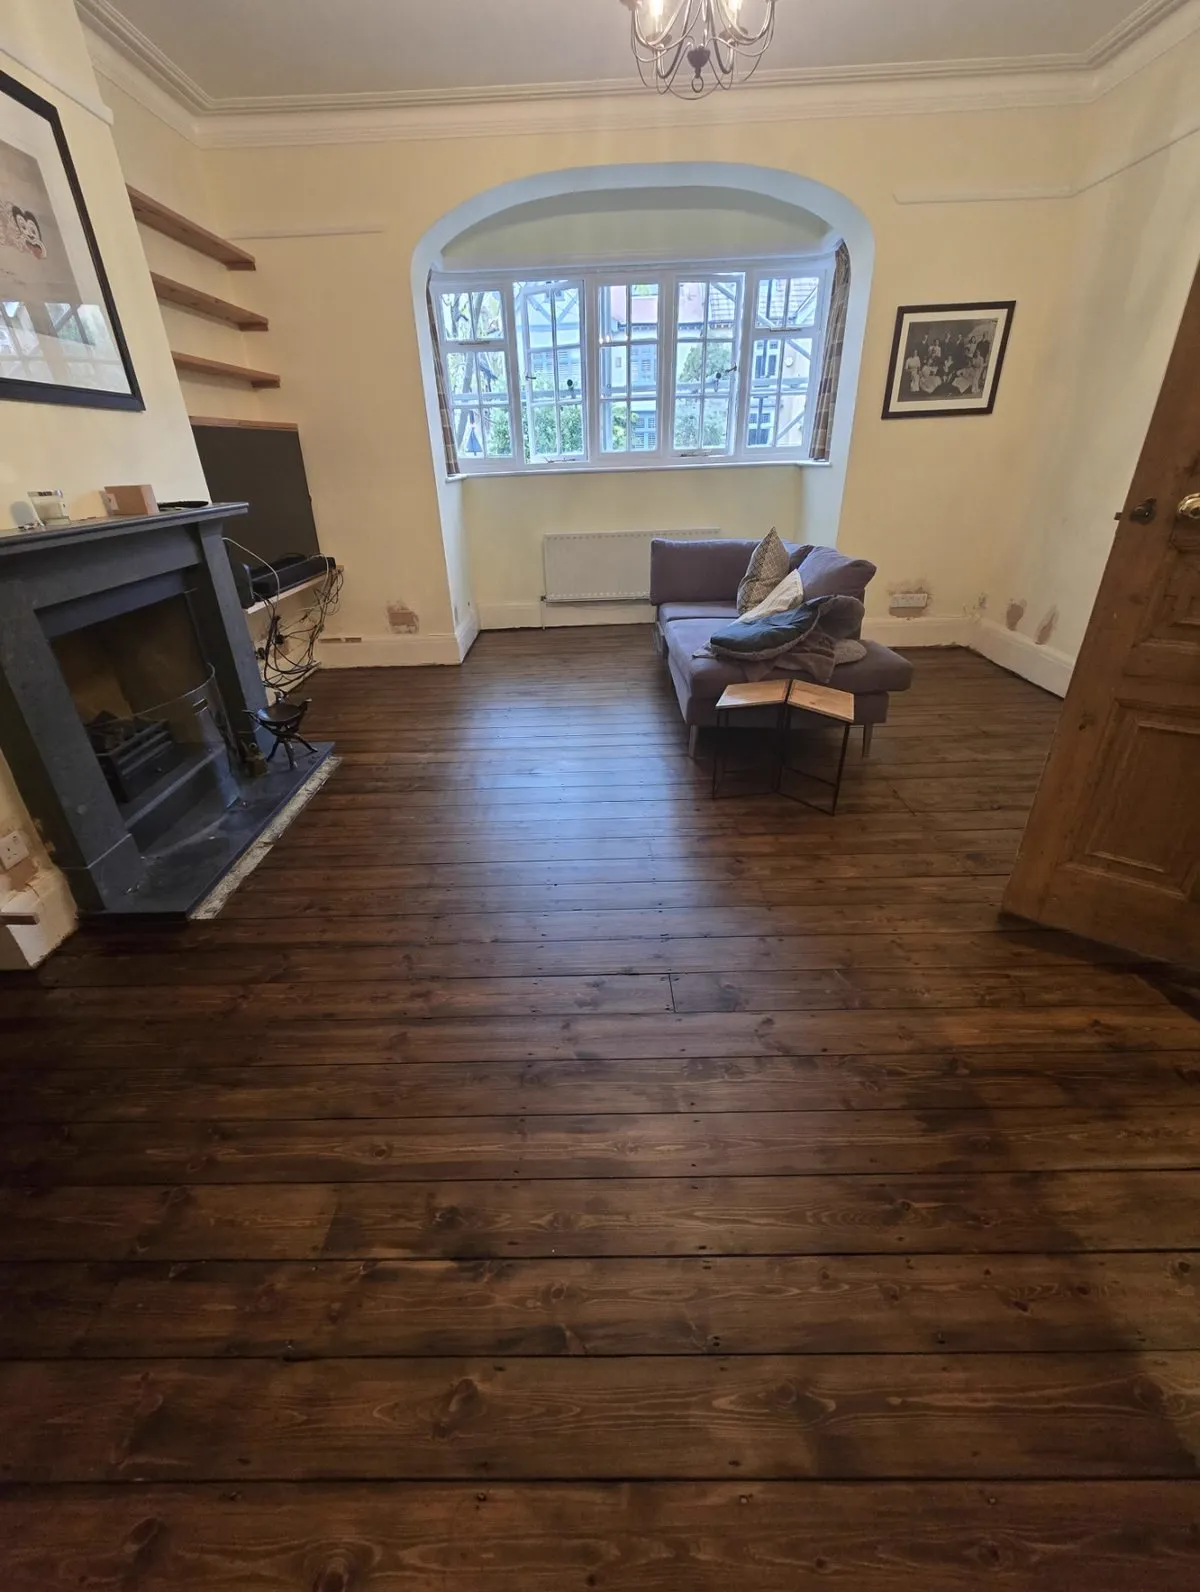
The Original Boards
Floorboard Sanding and Restoration in London
Original pine boards uncovered, repaired, gap-filled and given a proper three-stage sand by the two partners who priced the job.
★★★★★ 4.9 from 53 Google reviews
Home · Floorboard Sanding London
The Work We Do Most Of
The Original Boards, Not a Replacement For Them
Most people find us standing in a room with carpet they've gone off, wondering what's underneath. In most London houses built before the 1930s the answer is original pine floorboards, laid when the house was built and still there, hidden, a century later.
This page is about those boards specifically: lifting what covers them, repairing what needs repairing, filling the gaps and sanding them back to timber you would choose on purpose. It's the work we've done more of than anything else. Our floor sanding page covers the three-stage process itself in full, and if your floor is a different animal altogether, a parquet, a hardwood, a floor that's been through a flood or a bad building job, our wood floor restoration page covers whole-floor rescue of any wood floor.
One of us, Dean or Luke, is on every job. Between us that's over 40 years' combined hands-on experience, most of it on exactly this kind of floor.
The First Morning
What Comes Up When the Carpet Comes Up
Nobody carpets over a floor they love, so a floor that's spent years under carpet arrives with baggage. The carpet and underlay come up first, then the real work starts before any machine is switched on.
- Gripper rods prised up from around every wall, and the pin holes they leave dealt with
- Underlay staples pulled one by one; missing even a few tears the sanding belt on the first pass
- Every nail and tack punched below the surface of the boards
- Paint splashes from old decorating and the hard edges of past stains, sanded out in the first cut
- Loose boards screwed down so the floor is quiet before it's beautiful
None of this is glamorous, and all of it decides how the finished floor looks. A first cut over a properly cleared floor runs true. A first cut over a missed staple leaves a scar you chase for the rest of the job.
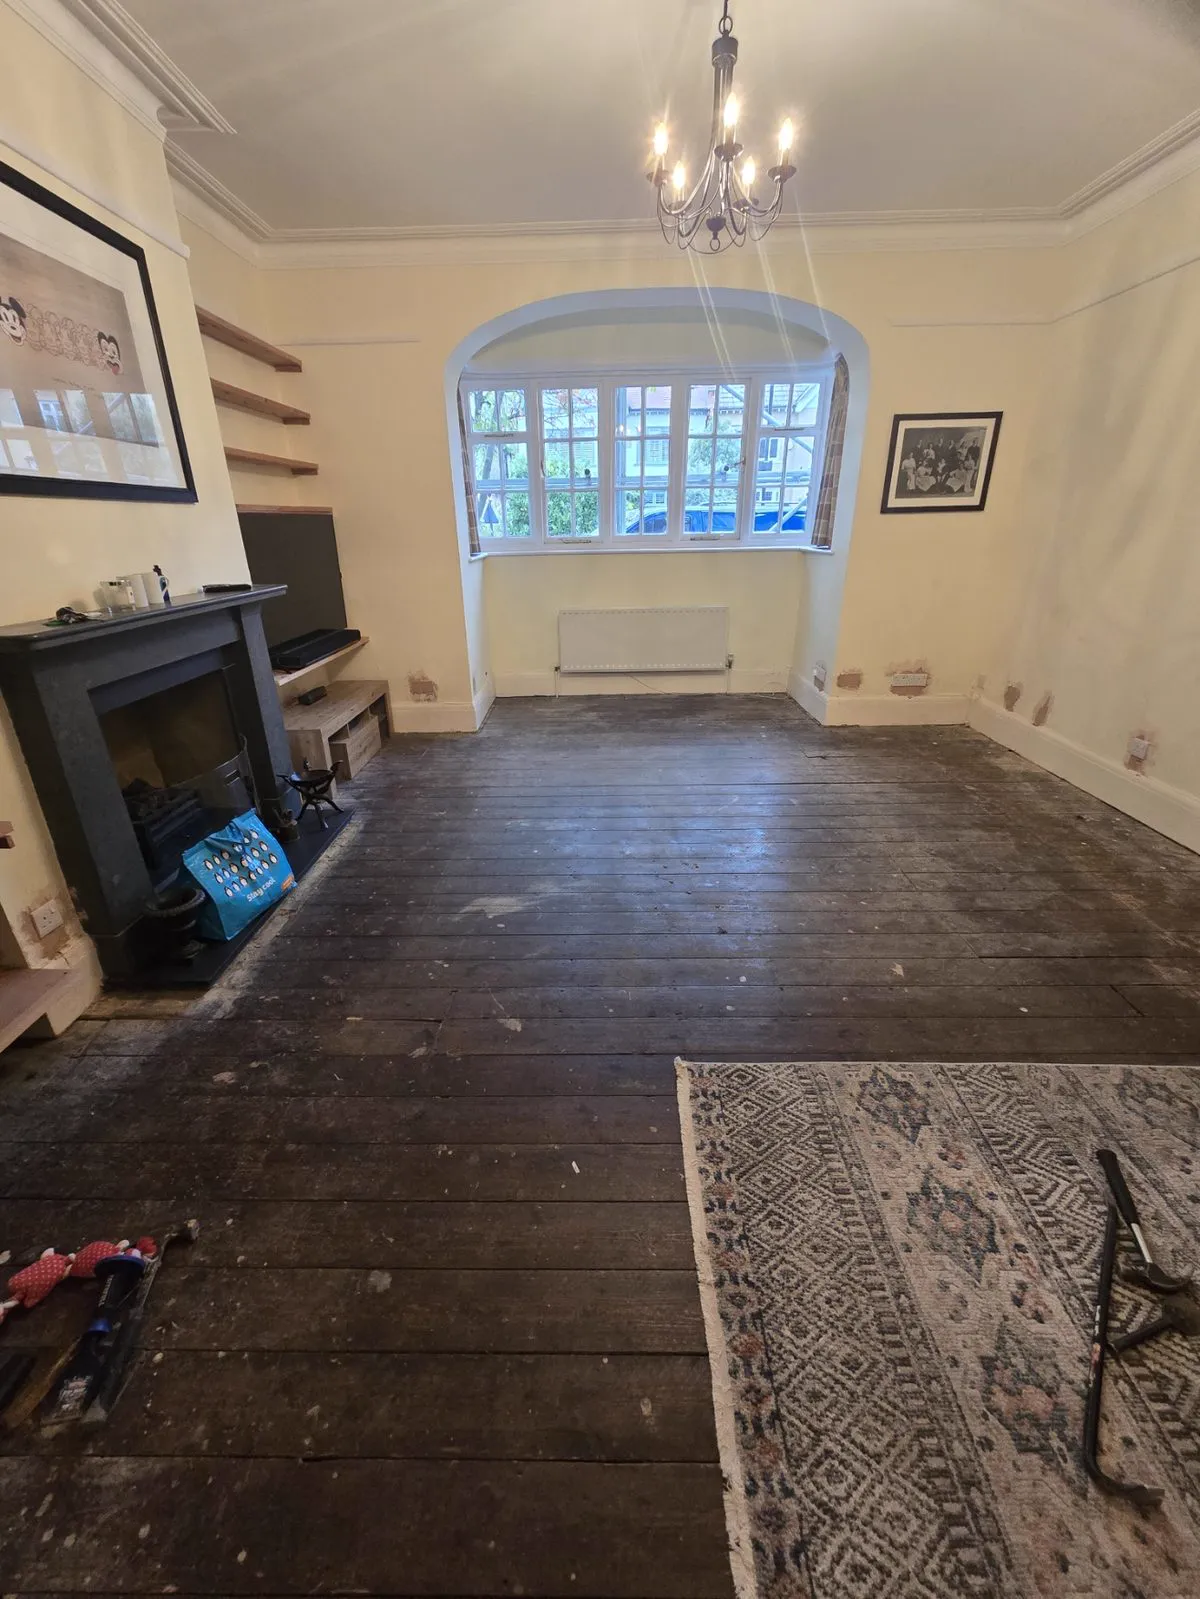
Boards as we find them: dark, marked and completely worth saving.
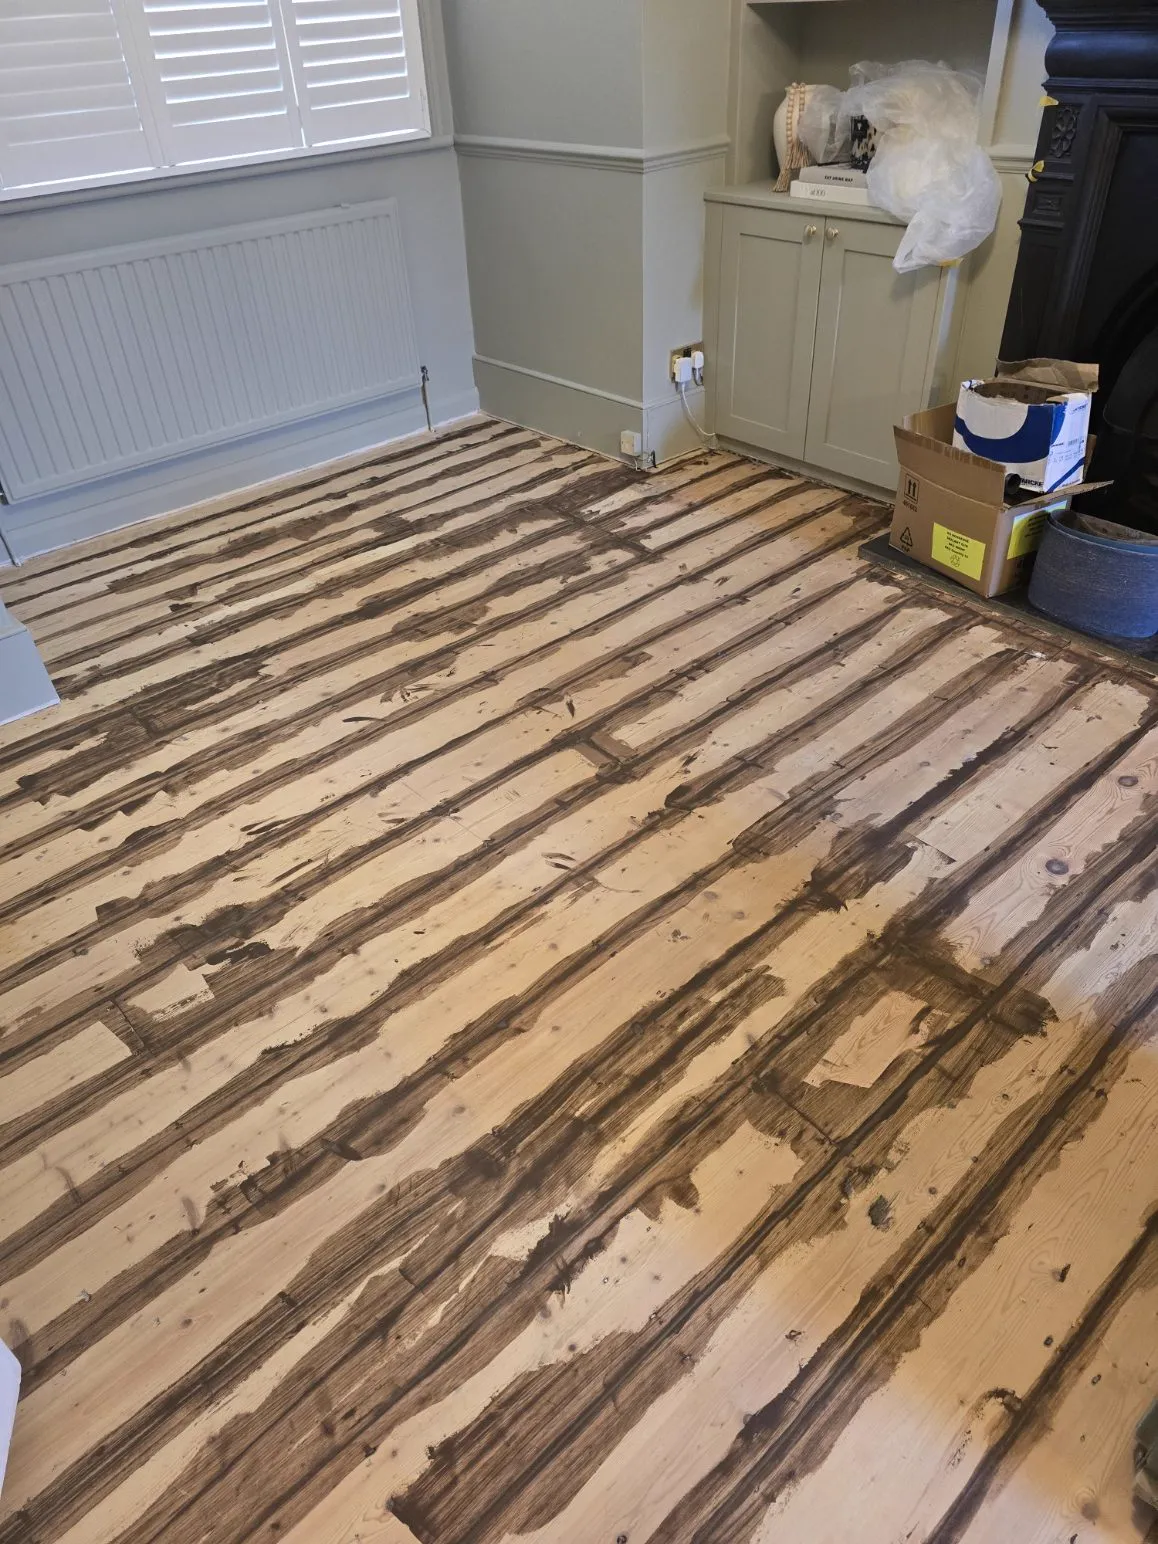
Flexible filler run along every gap, mid-job.
Draughts, Sorted Properly
Gap Filling That Moves With the Boards
Floorboards sit over a ventilated void, and they move: they swell a little in summer and shrink a little in winter. That movement is why hard resin fillers fail. Resin sets rigid, the boards keep moving, and within a couple of winters the filler cracks out and the gap looks worse than before it was touched.
We fill gaps with a flexible filler that stays flexible, moving with the boards through the seasons. The widest gaps get traditional slivers of pine, glued and tapped in by hand the way it was done when the boards were laid. You feel the result in the draughts as much as you see it in the floor.
We've written up the full argument, with the failure photos to prove it, in flexible filler vs resin.
Repairs Before Machines
Board Repairs in Reclaimed Pine
Most floors we uncover have a few casualties: boards split by a plumber's lifting bar, scorched by an old hearth, cut about for pipework and never put back properly. New softwood from a timber yard is the wrong answer. It's a different density and a different colour, and it stays a bright stripe in the floor for years.
We repair with reclaimed pine of a matching age and width instead. Old boards sand and take a finish the same way as their neighbours, so the repair disappears into the floor rather than announcing itself. While the boards are up we deal with creaks and loose fixings at the same time, because that's the cheapest moment those problems will ever have.
The full method is in our board repairs post, and our repairs page covers repair work on every kind of wood floor.
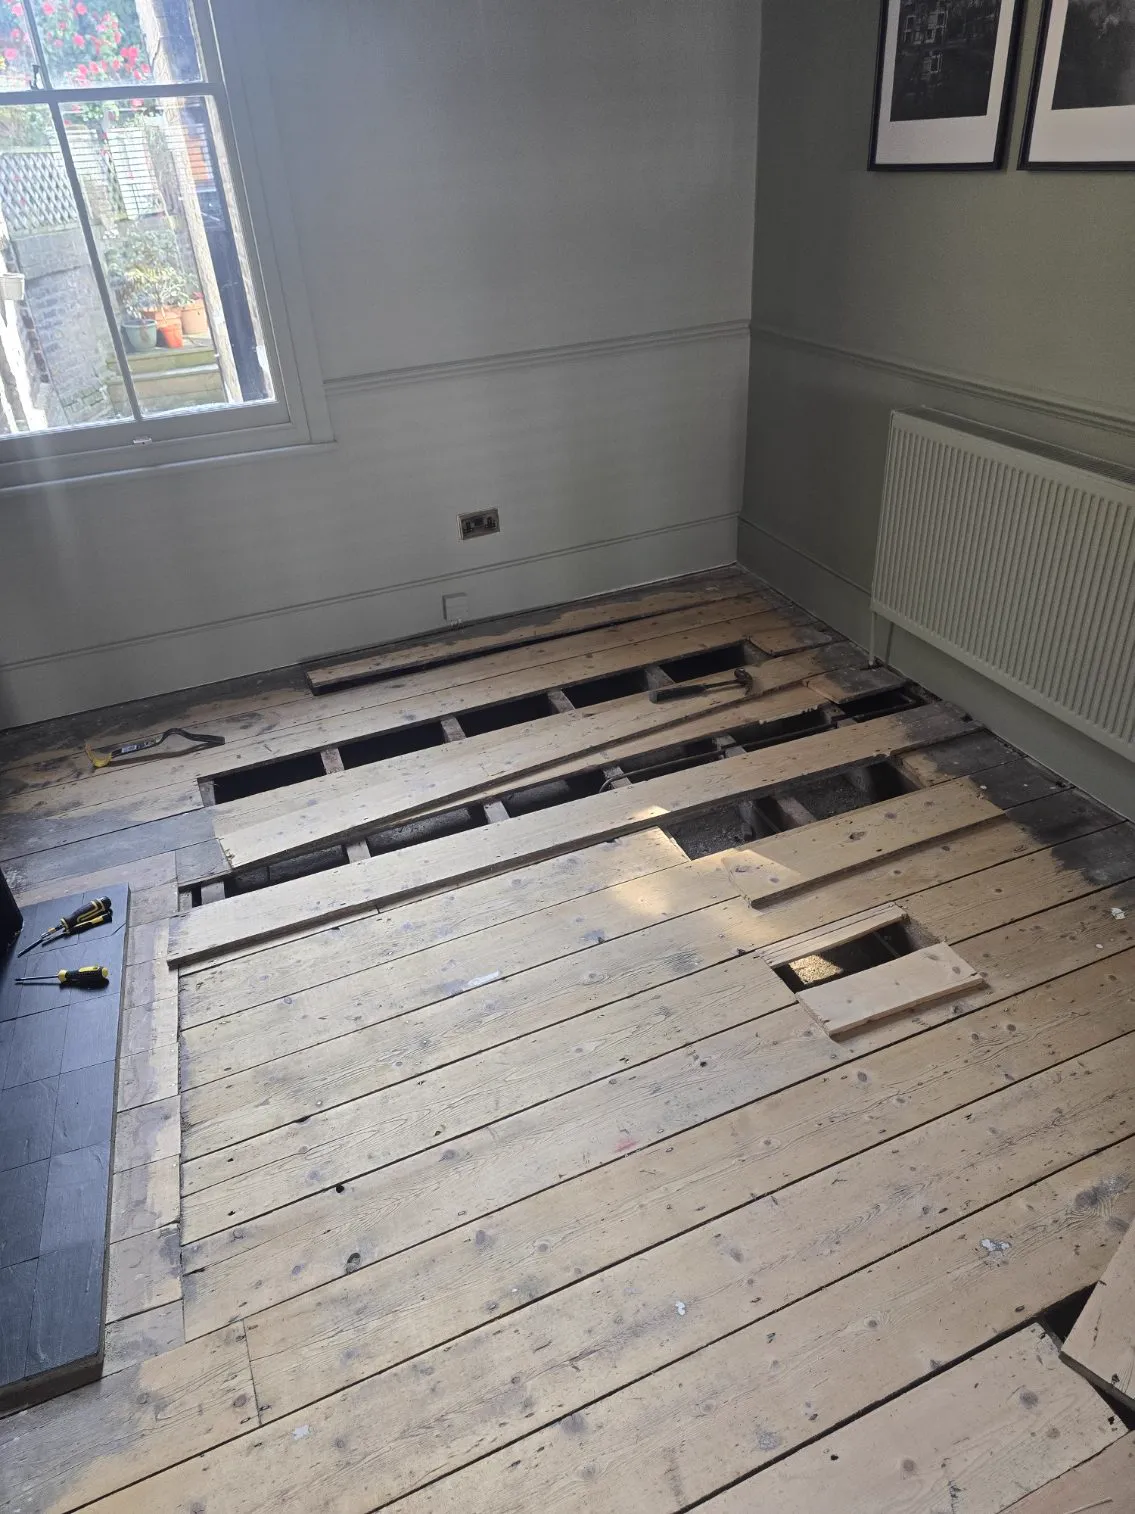
Damaged boards out, reclaimed pine going in.
Period Property Specialists
Victorian Floorboards
London's terraces and semis from the Victorian and Edwardian years were floored in pine as standard, and those boards are a different material from anything you can buy new. The timber was slow-grown, so the growth rings sit close together and the boards are denser and more stable than modern softwood. They were cut wide, often square-edged rather than tongue-and-groove, and nailed straight down to the joists.
That construction is exactly why they respond so well to restoration. Square-edged boards can be lifted individually for repairs and put back without wrecking their neighbours. The dense timber takes a three-stage sand cleanly and holds a finish for years. And the knots, nail heads and grain variation that make each floor its own are features worth keeping, not defects to hide.
Our workshop habits are built around these floors: reclaimed pine for repairs, slivers for the widest gaps, and a final sanding pass taken finer when the boards are being stained, because colour shows every shortcut. If you want the step-by-step, we've written the whole thing up in how we sand a pine floor. You can see finished examples in the gallery and read what the owners thought on our reviews page.
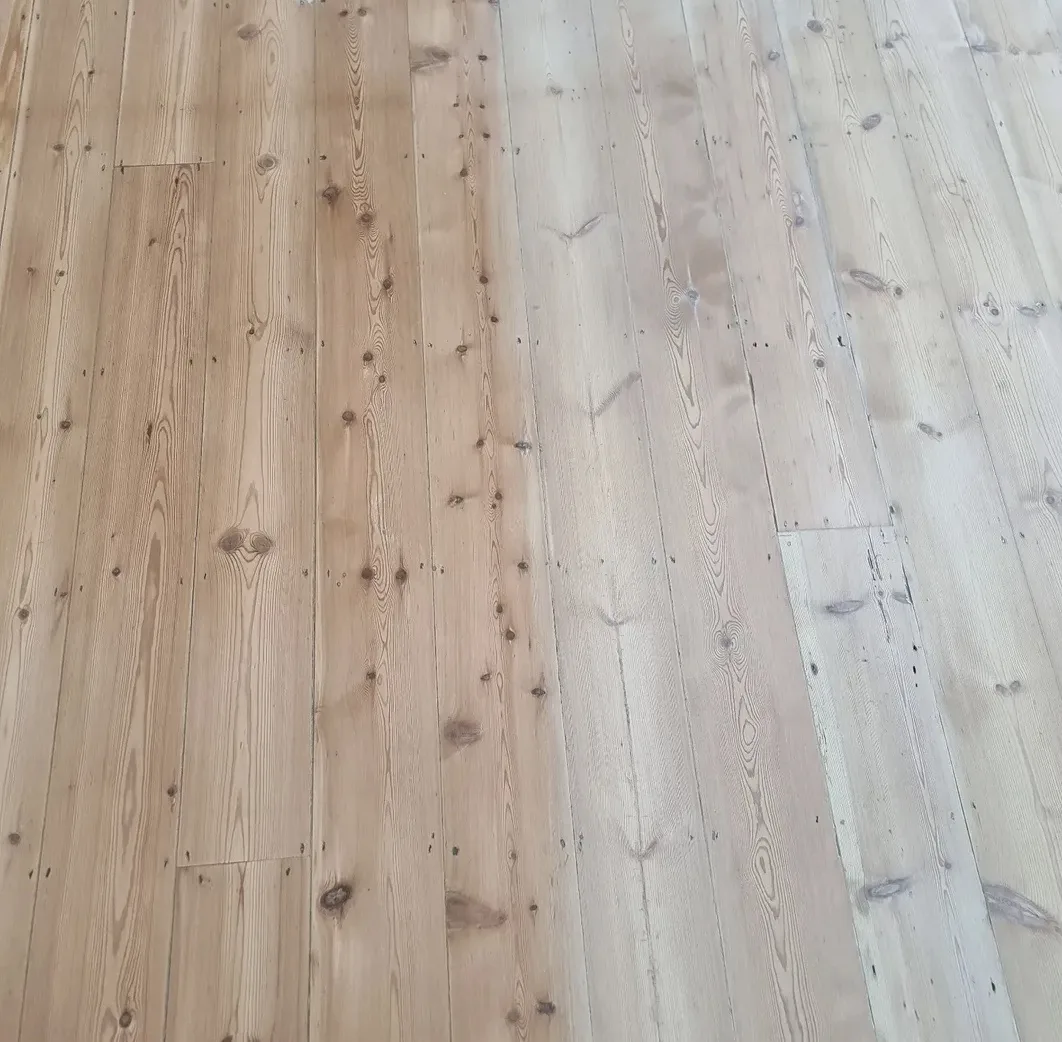
Half done: orange lacquered pine on one side, the pale finish on the other.
The Colour Question
Taking the Orange Out of Old Pine
The thing people dislike about old pine is rarely the pine. It's the orange: decades-old lacquer that's ambered in sunlight until the whole floor glows like marmalade. Most of that colour lives in the finish, not the timber, so the bulk of it comes off in the sand.
If you want the boards paler than bare pine, a white-tinted oil or a raw-effect lacquer holds the timber at that fresh-sanded look instead of letting it warm back up. We confirm the choice with a patch test on your own boards before committing to the whole floor, and our staining page covers the full colour range if you want to go the other way entirely.
The before-and-afters are in taking the orange out of pine, and you can preview a colour on a photo of your own room with the floor visualiser before we ever start.
Then the Machines
A Three-Stage Sand, and the Truth About Dust
Once the floor is cleared, repaired and filled, it gets the same three-stage sanding process as every floor we touch: machine-sanded at least three separate times, each pass with a finer abrasive than the last, with the edges done by a dedicated edge sander and the corners finished by hand. We own every machine we use.
On dust, the honest version: every floor machine runs with industrial dust extraction that captures around 95% of the dust at source, so the house stays remarkably clean. The hand work in corners and detail spots does raise some dust locally, and nobody in this trade is truly 100% dust-free. We tape doorways, protect what stays in the room and clean as we go.
The finish is your choice of oil or lacquer, three coats if lacquer, two if oil, chosen from real samples included in the price. For what a job like this costs, with real worked examples, see the floor sanding cost guide.
Same Hands, Every Job
Who Turns Up to Sand Your Boards
Howard Naish is Dean Naish and Luke Howard, and one of us is on every job. The person who lifts the corner of your carpet on the site visit is the same person who runs the machines. Between us we've got over 40 years' combined hands-on experience, we're on Checkatrade, and we carry public liability insurance, certificate on request.
We're based in Balham and work across South London and central London. More than 50 Google reviews put us at 4.9 stars, and a striking number of them mention the same thing this page is about: boards found under carpet that the owners didn't know they had.
No Obligation
Carpet up and not sure what you are looking at? One of us will come and tell you straight.
Book a Free Site VisitStraight Answers
Floorboard Questions, Answered
My floorboards have been under carpet for years. Are they worth sanding?
What happens to the gripper rods, staples and tacks?
Do you fill the gaps between the floorboards?
Some of my boards are split or damaged. Can you replace them?
Can you take the orange colour out of old pine?
Is sanding floorboards dusty?
Do I need to lift the carpet before you arrive?
How much does floorboard sanding cost?
From Our Google Reviews
"Dean and team did an amazing job in my place in restoring painted pine floorboards to their former glory! Worked really efficiently, with a great communication and attention to detail. Results were way better than I expected. Highly..."
Thirty Seconds, Five Boxes
Tell Us About Your Boards
Leave your details and we'll ring you back to arrange your free site visit.
We're booking about three months ahead at the moment, and a deposit holds your place in the queue. Dates tight? Ring us anyway, cancellations happen and smaller jobs can often be slotted in.
Every job is backed by the Howard Naish Workmanship Promise: 2 years on installation, 12 months on sanding and refinishing. If our work fails, we fix it.
Free Quote, No Obligation
Find Out What Your Carpet Is Hiding
One free visit: we lift a corner, look at the boards and tell you straight.
020 3131 0122